
I was really looking forward to working with alcohol ink on canvas - I've been wanting to try this for some time. A few online posts recommended sealing the canvas first with Kilz Primer/Sealer Paint so that's what I did. This paint is a white, water-based primer found in most hardware stores. Alcohol inks work best on a non-porous surfaces and priming the canvas provides this, otherwise the ink would just soak into the canvas and not blend.
supplies used: Kilz Primer/Sealer paint, white canvas on wood frame, Ranger alcohol inks, alcohol ink blending solution, 91% isopropyl alcohol, mixing palette, eye dropper, brushes, spray bottle filled with isopropyl alcohol, paper towels, gloves.
I applied the Kilz paint primer in all directions on the canvas and let it dry overnight.
Painting with ink is different than painting with paints so I knew some experimenting would need to happen. I had this image in my mind of large leaves and some flower petals but I couldn't get the leaves to work out.
A few wipes with paper towel and blending solution removed most of the ink but still left faint color areas. So if my initial idea won't work then why fight it? I just let went with the flow (so to speak) and kept pouring different colors on canvas. I switched to blues and liked how it was looking then added some purple and a bit of green. Can't remember all of the ink colors used here but I know Sailboat Blue was one of them. I dipped brushes in the 91% alcohol solution to move the ink around, and then this image started forming. It reminded me of a nebula so I added a few splatters of regular white paint for stars. I love the result.

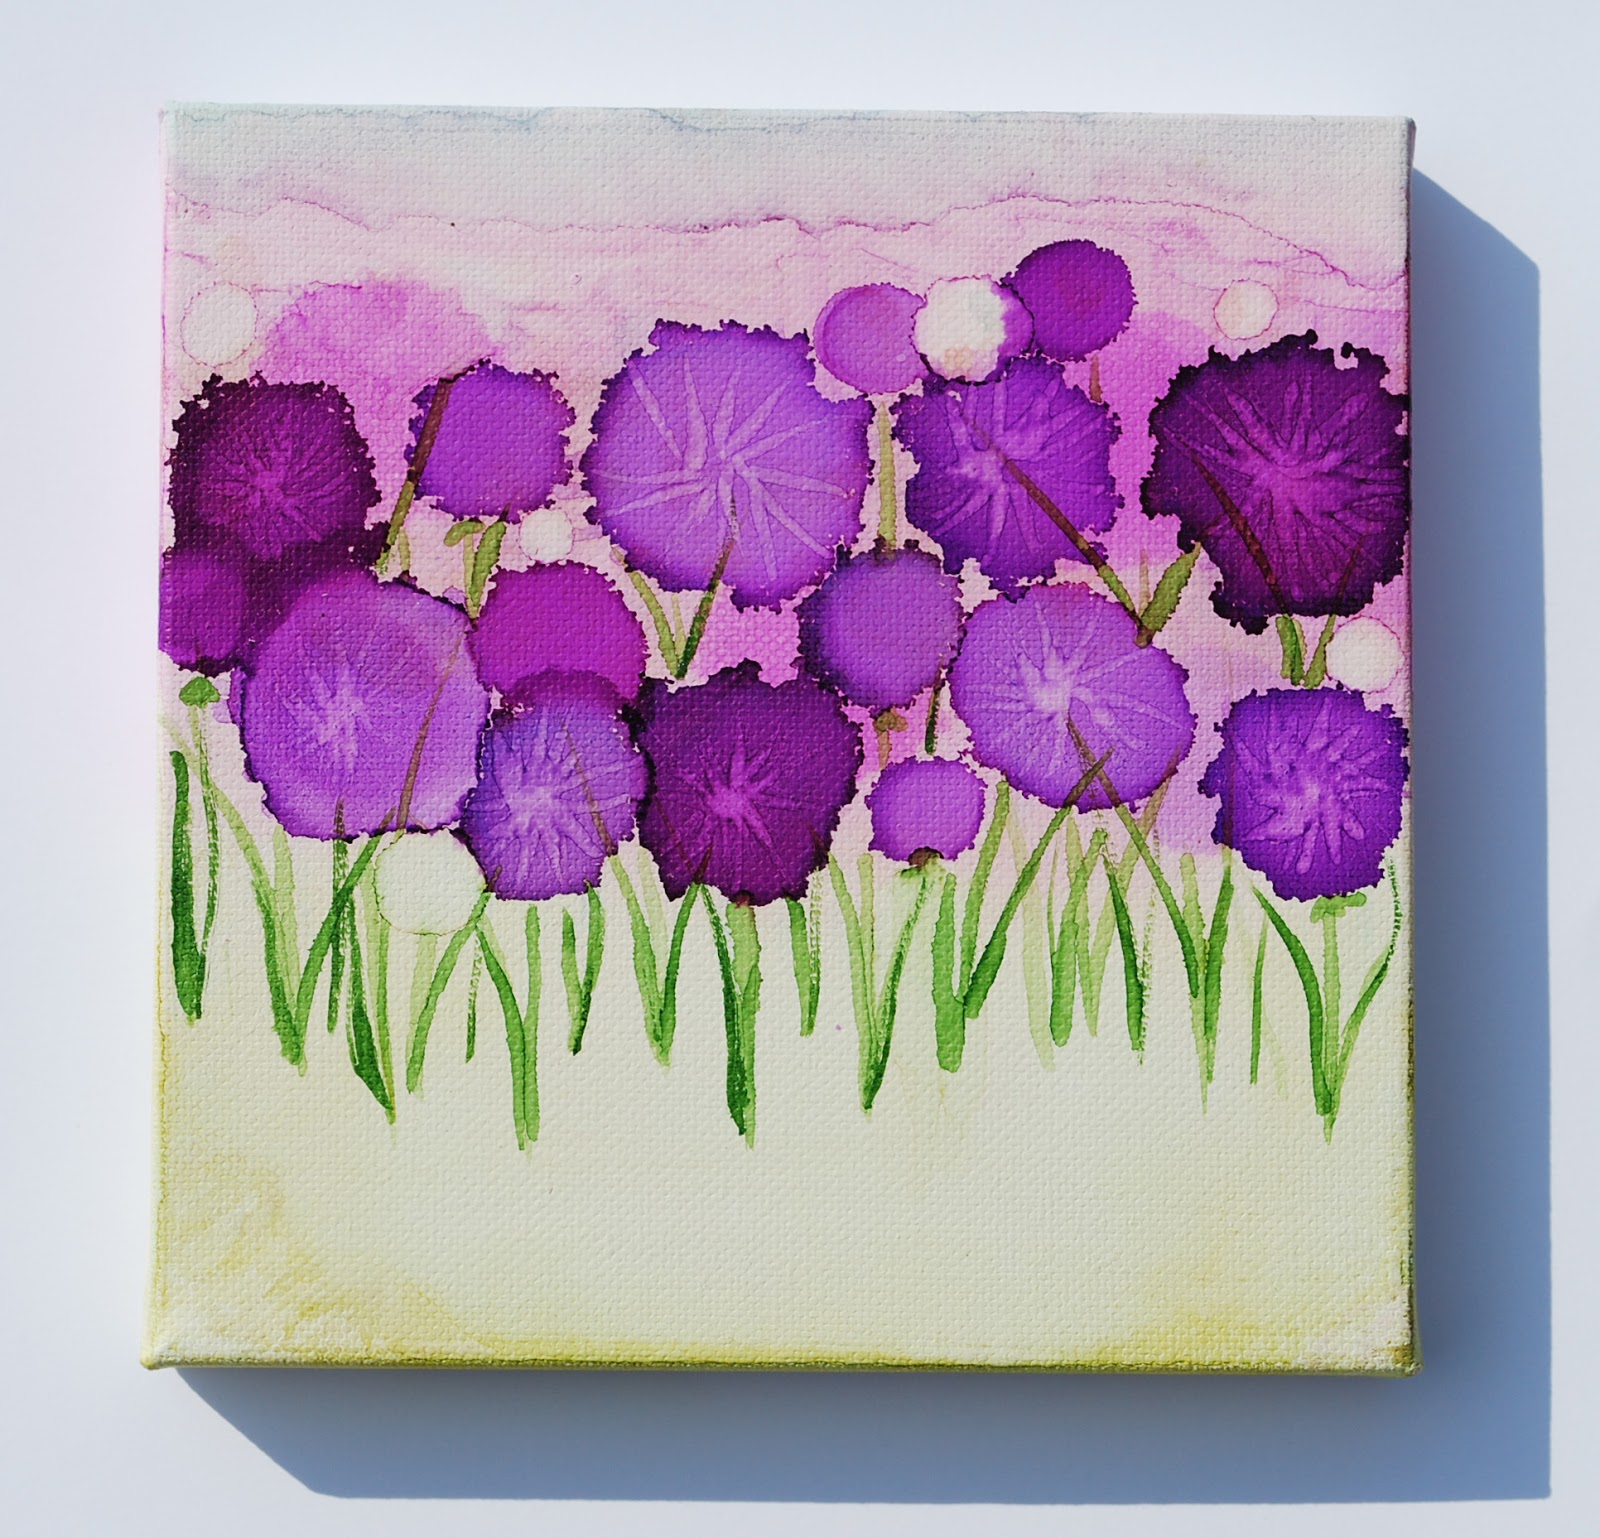
With this next piece I wanted a watercolor looking wildflower meadow look. After a few attempts that didn't seem to be working too well either. When I started dropping the ink on the canvas it was spreading out way too much and mixing around and I didn't get the circle effect I wanted.
You really need to be careful when making drops of ink on the canvas, they keep spreading and spreading! So I wiped off the ink and set the canvas aside to dry, intending to cover the canvas with Kilz and start again.
After it dried the canvas still had small areas of lavender which made me think of Allium flowers, one of my fav spring blooming flowers. So I carefully dropped small amounts of purple alcohol inks with an eye dropper onto the canvas. Inks used for the flowers were:Eggplant, Purple Twilight, and Wild Plum. I added different amounts of 91% alcohol sol to "water down" the ink to get some shading. Also I waited several min between drops so the colors wouldn't all pool together.
When the circles seemed dry to the touch I took a small brush, dipped in 91% alcohol to pull the color away from the center. A small brush, also dipped in 91% alcohol, then in alcohol inks, was used to make the stems/leaves. Ink colors: Botanical, Citrus.
so overall I was happy with my first attempts at painting on canvas with alcohol inks. Watch for upcoming posts on other alcohol ink paintings from that day.


